
Workspaces
ParseSphere lets you have conversations with your data. You upload files—spreadsheets, PDFs, documents—and then ask questions in plain English. The AI reads your files, runs queries, and gives you answers. No SQL knowledge required.
But here's the thing: if all your files lived in one giant pile, every question would search through everything. Your HR policies mixed with sales data mixed with customer feedback. That's a mess.
Workspaces solve this. They're project folders that keep related files together and separate from unrelated ones. Each workspace has its own set of documents and its own conversation history.
How It Works
Create a workspace
Upload your files
Chat with your data
The AI only looks at files in the current workspace, so you get relevant answers without noise from unrelated data.
Creating a Workspace
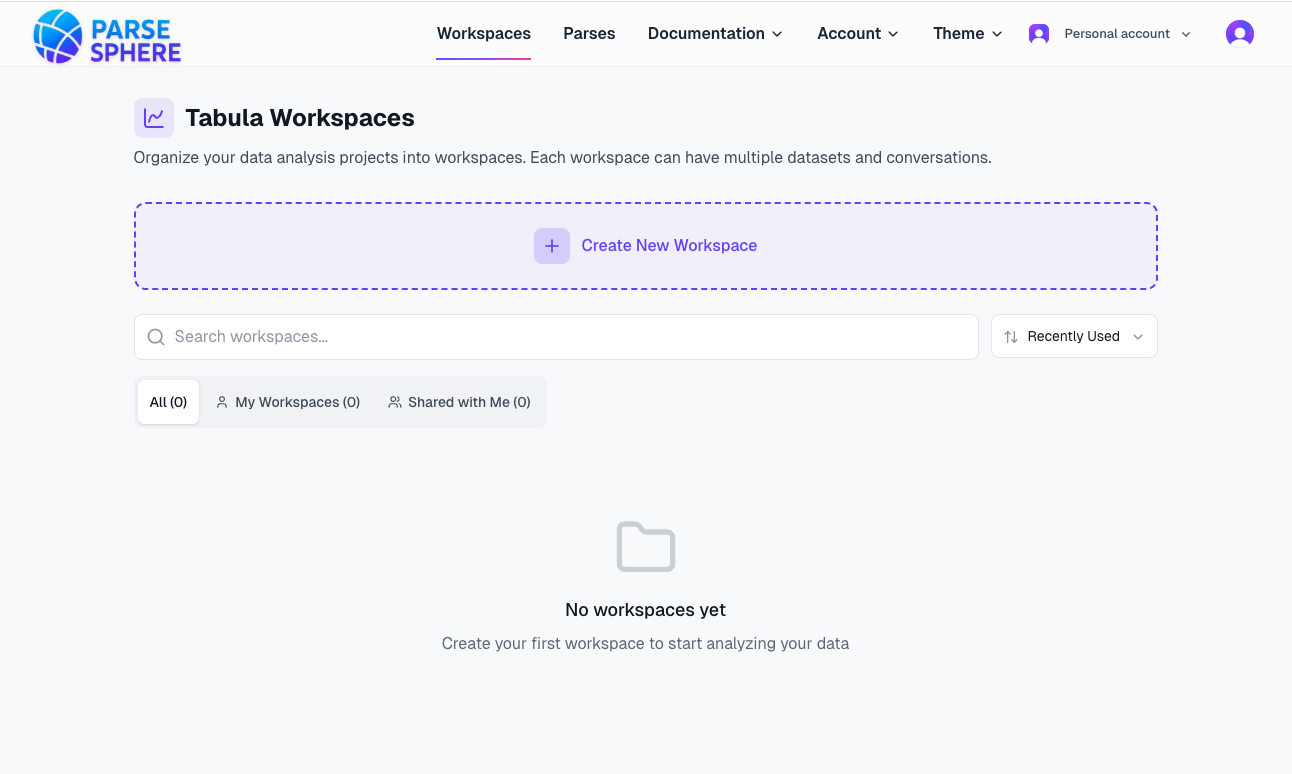
From your dashboard, click Workspaces in the navigation, then hit Create New Workspace.
You'll see a dialog asking for:
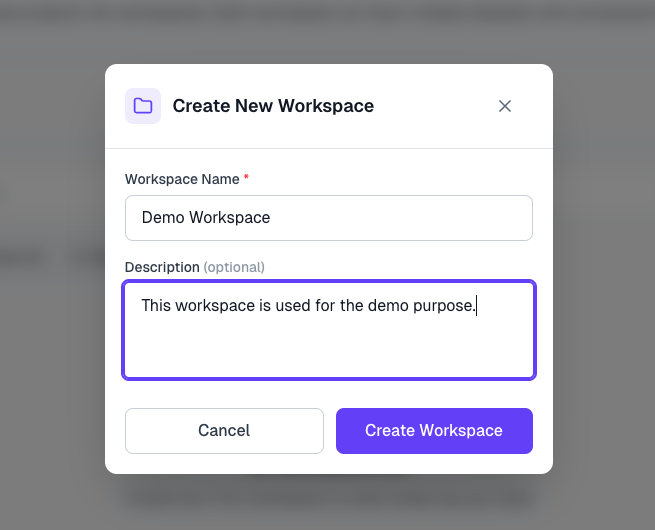
Workspace Name — Required. Pick something you'll recognize later. "Q4 Sales Analysis" beats "Untitled" every time.
Description — Optional but helpful. A sentence about what this workspace contains saves you from opening it just to remember what's inside.
Private vs Shared Workspaces
By default, workspaces are private. Only you can see them, access the files, or read the conversations. Nobody else—not even your team—knows they exist.
When to Keep It Private
- Personal analysis or experimentation
- Sensitive data you're not ready to share
- Draft work before presenting to stakeholders
Shared Workspaces
If the workspace belongs to an organization, you can share it with specific teammates. There's no setting that shares a workspace with your whole organization at once—sharing is per-workspace and per-member, and you choose exactly who gets in and what role they get.
Open the workspace, go to Settings in the sidebar (visible to workspace Owners and Admins), then open the Members tab. Search for a teammate by name or email—only people who are already members of your organization show up—pick a role, and add them. You can change anyone's role, or remove them, from the same list later.
Roles at a glance:
| Role | Can do |
|---|---|
| Owner | Everything an Admin can, plus delete the workspace. Assigned automatically to whoever creates the workspace—can't be reassigned or removed. |
| Admin | Manage workspace settings and members (add, remove, change roles). Full access to upload, edit, and delete files, datasets, prompts, and folders. |
| Editor | Upload, edit, and delete files, datasets, prompts, and folders. Can't manage members or workspace settings. |
| Viewer | Read-only: view files, datasets, prompts, and query history, and chat with the workspace's data. Can't upload, edit, or delete anything. |
Information
The Members tab only appears for workspaces that belong to an organization, and only Owners and Admins can manage members. Being a member of the organization doesn't automatically give someone access to a workspace—see the Organizations guide for the full sharing workflow, including how to invite people to your organization in the first place.
What's Inside a Workspace
The workspace uses a sidebar layout. The left sidebar has three collapsible sections:
- Chats — Your conversations with the AI about this workspace's data
- Documents — Upload, view, and manage your files
- Queries — History of SQL queries the AI ran on your behalf
At the top of the sidebar you'll find + New (start a new chat) and Attach (upload files). At the bottom, Owners and Admins see a Settings link for managing the workspace description and members.
Managing Your Workspaces
Finding Workspaces
The workspaces page has three filters:
- All — Everything you have access to
- My Workspaces — Workspaces you created
- Shared with Me — Workspaces others shared with you
Use the search bar to find workspaces by name, or sort by Recently Used to surface what you've been working on.
Renaming and Deleting
Hover over any workspace in the list to see action icons:
- Rename — Change the workspace name
- Delete — Remove the workspace permanently (all files and conversations will be lost)
Updating Settings
Click Settings at the bottom of the workspace sidebar to:
- Edit the workspace description (General tab)
- Add, remove, or change the role of workspace members (Members tab, organization workspaces only)
Tips for Organizing Workspaces
One project per workspace. Mixing unrelated datasets leads to confused AI responses. If your sales data and customer feedback don't relate to each other, they belong in separate workspaces.
Use clear names. Six months from now, "Customer Churn Analysis - 2025" tells you everything. "Analysis 2" tells you nothing.
Add descriptions. A quick note like "European region only, amounts in EUR" helps both you and your team understand what's inside without opening it.
Archive instead of delete. If you're done with a project but might need it later, just leave the workspace alone. There's no limit on how many you can have.
What's Next?
- Organizations & Team Collaboration — Create an organization and invite teammates before sharing a workspace
- Document Upload — Learn how to add files to your workspace
- Chat with Data — Start asking questions
- Analyze your Excel and CSV files with AI — deep dive into spreadsheet analysis
- ParseSphere home — back to the main product overview